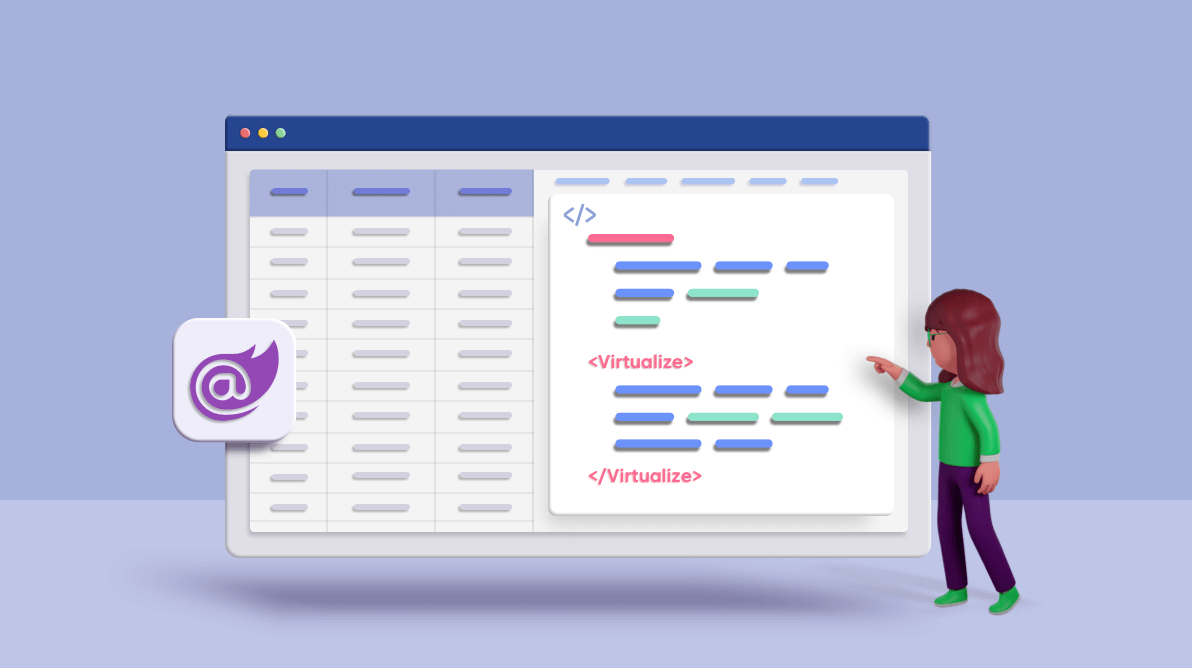
Virtualization is a technique that helps you to process and render only the items that are currently visible on the page (in the content viewport). We can use this technique when dealing with large amounts of data, where processing all the data and displaying the result will take time.
For example, if we want to display thousands of records in a table where the viewport can only hold 20 rows of data, we can use virtualization and process only the necessary data. Other data will be loaded and displayed dynamically when scrolling up or down.
Following are the prerequisites for implementing component virtualization:
- Visual Studio 2019 (update 16.8 or later)
- .NET 5 or later (Download link of .NET 5)
Creating a Blazor WebAssembly application with .NET 5
Virtualization in a component can be implemented either in Blazor WebAssembly or Blazor Server applications. In this blog, we are going to implement virtualization in Blazor WebAssembly.
Follow these steps to create a Blazor WebAssembly application:
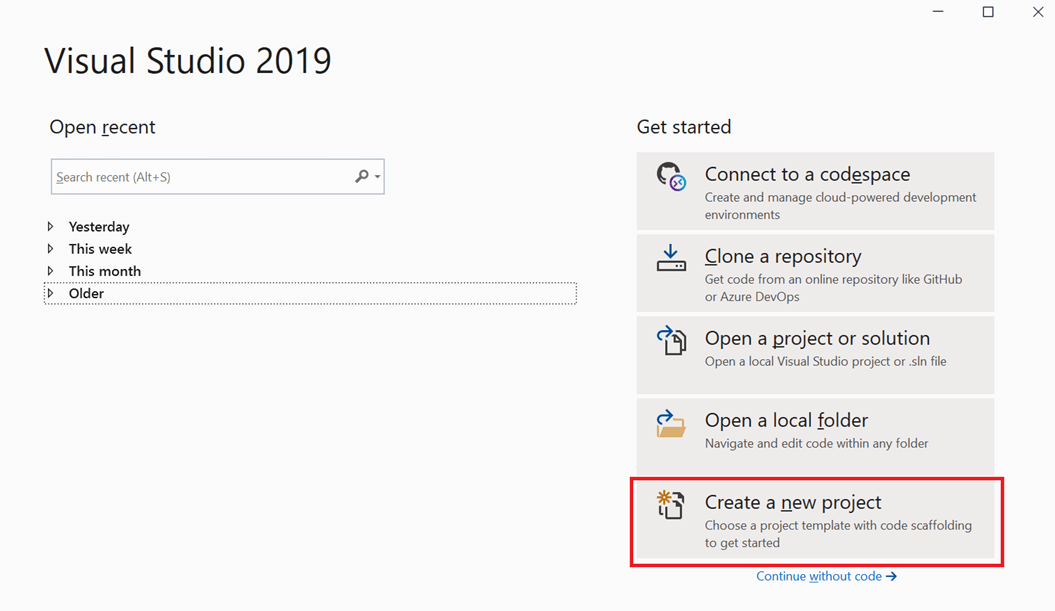
- Open Visual Studio 2019 and choose Create a new project.

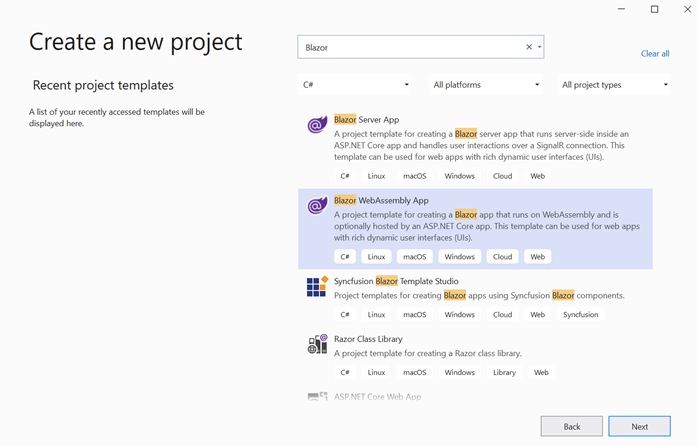
- Type Blazor in the search window, select Blazor WebAssembly App from the list and click Next.

- Enter your project name and click Next. Here, I am choosing the name BlazorVirtualizationSample.

- Then, the Additional information dialog will open. In that, select .NET 5.0 as the target framework and click Create.

The Blazor WebAssembly application will be created, as shown in the following screenshot.
Implementing virtualization
By default, the following three Razor pages will be included in the Blazor WebAssembly project:
- Counter.razor
- FetchData.razor
- Index.razor
Now we are going to create a separate Razor page called Employee.razor and implement virtualization.
Employee.razor
@page "/employee"

<h2>Employee Details</h2>

@if (employees == null)
{
    <p><em>Loading Employees...</em></p>
}
else
{
    <table class="table">
        <thead>
            <tr>
                <th>Employee Id</th>
                <th>Employee Name</th>
                <th>Role</th>
            </tr>
        </thead>
        <tbody>
            @*@foreach (var employee in employees)
                {
                    <tr>
                        <td>@employee.EmployeeId</td>
                        <td>@employee.Name</td>
                        <td>@employee.Role</td>
                    </tr>
                }*@

            <Virtualize Items="employees" Context="employee">
                <tr>
                    <td>@employee.EmployeeId</td>
                    <td>@employee.Name</td>
                    <td>@employee.Role</td>
                </tr>
            </Virtualize>
        </tbody>
    </table>
}

@code {
    private List<EmployeeDetails> employees;

    protected override async Task OnInitializedAsync()
    {
        employees = await GetEmployeeDetails();
    }

    private async Task<List<EmployeeDetails>> GetEmployeeDetails()
    {
        List<EmployeeDetails> employeeList = new List<EmployeeDetails>();
        List<string> roleList = new List<string>() { ".Net Developer", "Testing Engineer", "Graphic Designer", "Technical Writer", "Support Coordinator" };
        int roleArrayIndex = 0;
        int tempCount = 0;
        int employeeDataCount = 10000;

        for (int i = 1; i <= employeeDataCount; i++)
        {
            if (i > tempCount + employeeDataCount / roleList.Count())
            {
                roleArrayIndex++;
                tempCount = i - 1;
            }

            var employeeDetails = new EmployeeDetails()
            {
                EmployeeId = i,
                Name = "Employee " + i.ToString(),
                Role = roleList[roleArrayIndex]
            };

            employeeList.Add(employeeDetails);
        }
        return await Task.FromResult(employeeList);
    }

    public class EmployeeDetails
    {
        public int EmployeeId { get; set; }

        public string Name { get; set; }

        public string Role { get; set; }
    }

}
In Employee.razor, the GetEmployeeDetails() method returns 10,000 employee records with Employee ID, Name, and Role. Following are the few differences between the foreach section and Virtualize component.
In the classic approach of loading all the data during initial load, the application would take three to five seconds to load the page. Refer to the commented section of the code example.
@foreach (var employee in employees)
    {
        <tr>
            <td>@employee.EmployeeId</td>
            <td>@employee.Name</td>
            <td>@employee.Role</td>
        </tr>
    }
In the modern approach, when using virtualization, the application takes less than a second to display the initial data. Only the data that fits in the viewport is processed, so the time consumption is less than the classical approach.
<Virtualize Items="employees" Context="employee">
    <tr>
        <td>@employee.EmployeeId</td>
        <td>@employee.Name</td>
        <td>@employee.Role</td>
    </tr>
</Virtualize>
You can see in the following screenshot that only 23 rows of data were added to the table.
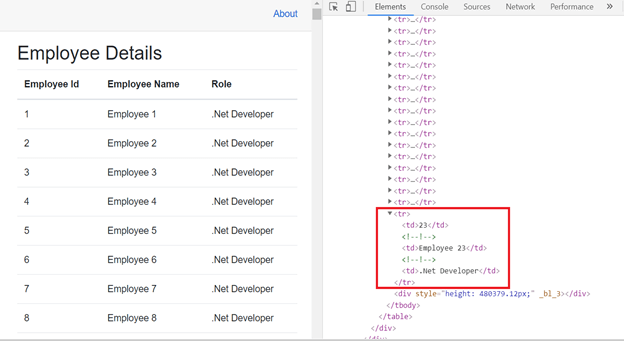
However, on scrolling down, more data will be fetched and displayed on the table.
ItemsProvider
To take control of the number of items loaded in the table per request, use the ItemsProvider property of the Virtualize component. The ItemsProvider (delegate) asynchronously retrieves the requested items on demand (when scrolling down or up).
Add this method to @codeblock in the Employee.razor file.
private async ValueTask<ItemsProviderResult<EmployeeDetails>> LoadEmployeeDetails(ItemsProviderRequest request)
{
    var employees = await GetEmployeeDetails();
    return new ItemsProviderResult<EmployeeDetails>(employees.Skip(request.StartIndex).Take(request.Count), employees.Count());
}
When using ItemsProvider, no data will be loaded during the initialization time. But the Virtualize component will call the LoadEmployeeDetails method with the start index and request count (number of items to load) parameter on demand.
Also, the Virtualize component allows us to show a loading message using a place holder while data is loading.
<Virtualize ItemsProvider="LoadEmployeeDetails" Context="employee">
    <ItemContent>
        <tr>
            <td>@employee.EmployeeId</td>
            <td>@employee.Name</td>
            <td>@employee.Role</td>
        </tr>
    </ItemContent>
    <Placeholder>
        <p>Loading employee details...</p>
    </Placeholder>
</Virtualize>
Remove the following in the Employee.razor file. Instead, use a placeholder to display a loading message until the item data is available.
@if (employees == null)
{
    <p><em>Loading employee details...</em></p>
}
ItemSize
ItemSize is the size of an element in pixels and its default value is 50 pixels.
By default, the Virtualize component measures the rendering size (height) of individual items after the initial render occurs. Use ItemSize to provide an exact item size in advance to customize the size of each row and to ensure the correct scroll position for page reloads.
<Virtualize Items="employees" Context="employee" ItemSize="49">
    <tr>
        <td>@employee.EmployeeId</td>
        <td>@employee.Name</td>
        <td>@employee.Role</td>
    </tr>
</Virtualize>
OverscanCount
OverscanCount determines the number of additional items rendered before and after the visible region as buffers. The default value of OverscanCount is three.
In the previous example, in the Virtualize implementation, we could see 23 data items on the page when we didn’t use the OverscanCount. If you want to load additional data items, customize the value of the OverscanCount. For example, if we set OverscanCount to 4, 24 data items load on the page.
Note: The default data item load count works based on the height of the container and the size of the rendered items. The data item load count might vary in different resolutions and zoom levels.
<Virtualize Items="employees" Context="employee" OverscanCount="4">
    <tr>
        <td>@employee.EmployeeId</td>
        <td>@employee.Name</td>
        <td>@employee.Role</td>
    </tr>
</Virtualize>
Resources
For more information, refer to the Virtualize component in the Blazor demo.
Conclusion
Thank you for reading this article! In this article, we have clearly explained how to achieve virtualization in an ASP.NET Core Blazor WebAssembly application, using the Virtualize component available in .NET 5. We also have explained customizing the virtualization. I hope you found this article informative.
Essential Studio for Blazor offers the largest collection of components for the Blazor platform. It has popular components like Charts, DataGrid, Scheduler, Diagram, Word Processor, and Maps. It also includes unique file-format libraries for manipulating Excel, Word, PDF, and PowerPoint files. Use them to build world-class applications!
Try our Blazor components by downloading a free 30-day trial, or check out our NuGet package. Feel free to peruse our online examples and documentation to explore other available features.
If you have questions, you can contact us through our feedback portal, support forums, or Direct-Trac. We are always happy to assist you!
Reference: ASP.NET Core Blazor component virtualization